samedi 28 août 2010

Flash tuto_ Cute plane game as2 part1 controlling position

Hello Flashers!!
In this Tutorial, I'm going to show you how to manipulate a plane position and how to make it move.
In the next tutorials I'm going to show you how to add enemies in your game and weapons to your little plane to score points, but only with actionScript 2.0.
I downloaded a plane image and delete its background with photoshop.

Open up flash and let's get started.

As I said before we are going to use actionScript 2. So open a new action Script 2 file or go (file->publish settings-> flash -> choose action script2).

I named the first frame as "BG" this frame will contain our background which is by the way will do 50% of the job.


 Minimize your page. Now draw your background.
Rq: the background image has the same height of the page but 4 times larger. The part of the image that's not in the page will not appear with swf file.


 Select all of your background image and convert it to a movie clip (F8 -> movie clip).
In this step we are going to make our background moving, it's like the camera will follow our future plane.
So go to frame 50 and create a keyFrame (left click->F6).

Select the first frame and move your backgrounf to the extreme right.
Now Select your last frame (the new keyFrame) and move your background to the extreme left.
Left click somewhere between the two keyFrames (the first and the last frame) and choose Create Classic Tween.
Test your movie (ctrl+ enter).
Now we are finished with our background so make it invisible and let us add our plane.
Create a new layer and name it "plane".
File->import -> import to library the photoshop made plane.


Grab your plane into the plane layer and adjust it size while pressing the shift key to keep it centered.
Convert the plane to a movie clip, and give it an instance name in the properties panel.
Select the first frame of the plane layer and press F9 to write some code.
Here's the code try to get it to use and modified as your needs.
var keyboardListener:Object = new Object();
keyboardListener.onKeyDown = function() {
        if (Key.isDown(Key.RIGHT)) {
                   pln._x +=2;
        }
            if (Key.isDown(Key.LEFT)) {
                   pln._x -=2;
        }
            if (Key.isDown(Key.UP)) {
                   pln._y -=2;
        }
           if (Key.isDown(Key.DOWN)) {
                   pln._y +=2;
        }
       
};
Key.addListener(keyboardListener);
Download all the work from here
Thanks for your attention. See you guys in my next tutorial.
Mazen :]

mercredi 25 août 2010

My Activities: Flash tuto_ Making a custom animated cursor

My Activities: Flash tuto_ Making a custom animated cursor: "Hello Flash lovers and welcome to another tutorial. In this tutorial, we are going to make an animated custom cursor in Flash with ActionScr..."

Flash tuto_ Making a custom animated cursor

Hello Flash lovers and welcome to another tutorial. In this tutorial, we are going to make an animated custom cursor in Flash with ActionScript 3.
This is an example of what we will make.
Open up a new Action script 3 file. First we are going to import a small image for our new mouse pointer.

Now convert it to a movie clip.
Give it an instance name so we can deal with it from ActionScript 3.
Press F9 and type this code.
I will repeat it for lazy people who just want to copy it.
Mouse.hide();
stage.addEventListener(MouseEvent.Mouse_Move,follow);
fnction follow (evt:MouseEvent){
   crs. x =  mouseX;
   crs.y= mouseY;
}
For those who are interested in learning, Hi again.
the Mouse.hide() function basically hides the mouse and if you want to show your mouse use Mouse.show() just like that.
Then we set up a fairly simple event listener for an event, for when the mouse moves. And everytime it does, we're going to make our movie clip follow it.
fnction follow (evt:MouseEvent){
   crs.x = mouseX;
   crs.y= mouseY;
}
This code says that every time you enter the frame, then the movie clip's position on the stage (csr.x and csr.y) will equal the x and y position of the mouse on the stage.
Well, thank you for reading this, and I hope you've learned something from it, you will find all the work
here http://www.megaupload.com/?d=6R0F8H5A
See you next time.
Mazen :)

Flash tuto_ The growing vine animation

To play the movie below: right click -> play or (lire).
Hello everyone in this new tutorial.
Today I'm going to show how to create the famous growing vine animation.
Open flash and let us get started.
File -> import -> import to stage.
we are going to import a vine VECTOR picture. you can download vector picture from many sites these are my two favorits:
http://www.vecteezy.com/
http://www.shutterstock.com
Or you can choose one of the vectors that I used it.
Here flash shows us the different layers in our document. Make sure that the bitmap check box is not checked, then press OK.
Press the hot key (q) for the free transformation tool and adjust your vine to fit your screen.
Name the current layer as Mask.
Make a new layer and name it Artwork. Put this layer under the mask layer (drag and drop technique).
Select the Mask layer and convert it to a mask.
Unlock the Artwork layer, make the two layers visible and change the fill color to outline (Just left click in the middle of the green square).
 Select the vector vine and press (ctrl+b) twice so we got the vector shape.
Now we can see the outline of our vine.
Next step is very easy but it needs some patience, In fact the more patient you are the more beautiful result you will have.
Select your Artwork layer.


Select your brush tool set it's size and it's color.
In your first frame of the Artwork layer use your brush to print a line just in the  root.
Press F6 for a new key frame and continue with coloring your vine.
These are some screen shots from my work.


Go to your last frame, press F9 and type (stop();) to stop the animation at the end.
You can notice that the Mask frames are increasing automatically.
Save your work and test your movie.

Thank for your attention, I'm really sorry of my bad English but believe me I'm doing my best.
If there anything not clear just post a comment and I ensure that I will reply insh'Allah.
Download all the work from here: http://www.megaupload.com/?d=3BJV3C1T
See you next time,
Mazen

dimanche 22 août 2010

Flash tuto_ Create a cute navigation bar for you site.


Hello everyone and welcome to a new flash tutorial!
This Time I will show you insh'Allah how to create a navigation bar for your sites.
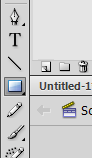
Open a new action Script File and set the Dimensions as below from the properties panel.


Now draw you rectangle in the top of the page, and convert it to a movie clip (F8 -> movie clip),
The rectangle may not be in a correct position, so to adjust it properly select it and go to the properties panel.
x:300/y:0/W:600/H:40
Add an instance name for your rectangle (navbarobjct for example).
Rq: the instance name is very important to manipulate a movie clip with action script.
Rename the First layer as navbar, then create a new layer and name it as "button".
In this button layer I'm going to create all the links I need for my site.


  Select the rectangle tool then choose a color different from the navigation bar's color.


Draw your button shape.
Flash doesn't know that we are going to use this rectangle as a button, So we have to tell him so.


Press F8 then choose the button type, you can also give it a logic name.
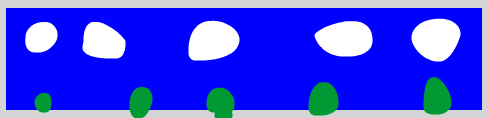
Now select the button object from your library and create 2 instances adjacent to each other.
Use your arrow keys to space between the buttons.
You will have something like the picture above.
As you know, a button has three 4 states: the up state, the down state, the hit state and the over state.
To add some interactivity to our buttons we have to change these states.
Double click a button from your page.


A new page opens that describes our button.
Create a key Frame in the over state rectangle (left click -> insert Key Frame).
Left click  on our button then go to the properties panel and change the "Fill color".

Do the same to the two other states.
Rq1: You can enlarge your button in the hit state (go to the free transform tool and change your button's size).
Test your movie (ctrl+ enter).
Rq2:  You can notice that all the buttons are changed in the same way that's one of the great features of oop (object oriented programming). All the buttons are instances of the same object and we can add to each one a unique instance name so we can manipulate it separately.
Now let us add some text to our buttons! But first we have to create a new layer and called it text.
Select your text tool and type the button indicators in the right place.


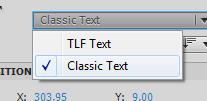
After doing that select all you texts, go to the properties panel and change TLF text to classic text.

Select your first frame and press F9.
write the stop command. "stop();"


Now I'm going to create a page for the 'contact me' button and another for the portfolio button.
Make a new layer you can call it "content" for example.
 in the fifth frame insert a key frame and set your "contact me " content. It can be a web page a photo or text.
In my case I made a simple text animation (you can learn how to do so by going to this tutorial click here).
 In your last frame type the stop command, then insert a blank key frame next to it.
Do the same thing to the portfolio content.
Now let us go back to our buttons in the first frame to link each button to its page.
Give each one of the button a unique instance name in the properties panel.
Next select a button then (window -> code snippets) .
Select the Timeline Navigation folder and choose click to go to frame and play.
The code will generate automatically like magic in your code editor, all what you have to do is to change the number of the frame in (gotoAndPlay(5)) for example in my case the content of the "contact me" page starts at the 10th frame so I have to change the code to "gotoAndPlay(10)".

Do the same procedure to your other buttons, nothing is difficult!

Now say that you want to add a "Follow me on twitter" button or you want to link a button to a web page.
All what you have to do is to select your button then (window -> code snippets)
select "Click to go to web page" from the Action folder.
change the URL as you like.
Rq: the "_blank" attribute open the web page in a new window.
you can download all the work from here:
http://www.megaupload.com/?d=WM8LY0EJ
Thanks for your attention.
Mazen :)